Chapter 2.3.2 ScreenGrab
ScreenGrab is the default screenshot tool for Lubuntu after Lubuntu 19.10.
Usage
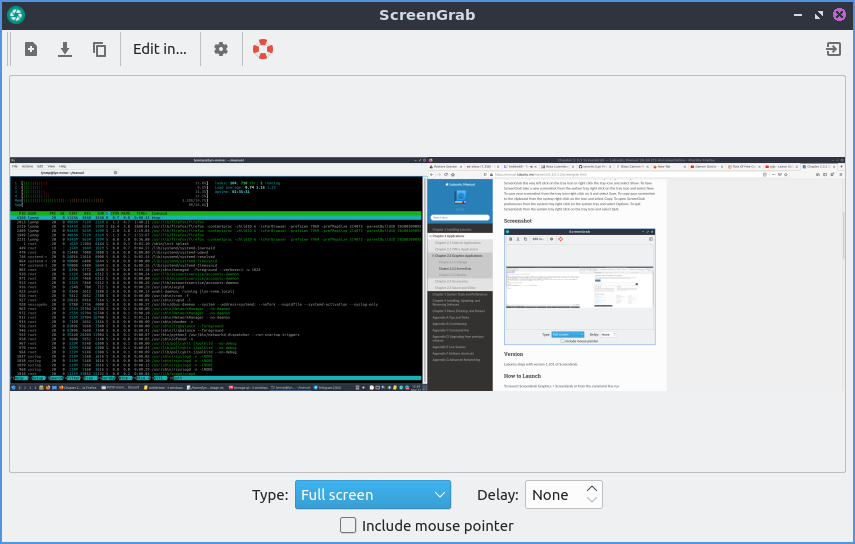
To take a new screenshot press the button with a piece of paper with a + on it or press Control+N. After doing this a preview will appear in the center of the window. If you want to save this screenshot press the save downward pointing arrow or press Control+S. To copy your screenshot to a clipboard press the button with two pieces of paper or press Control+C. To edit your screenshot in an image editor and select the program you want to use to edit or double click on the image to open it in an editor. To quit ScreenGrab press Escape or press the button to the right with a door and a rightward pointed arrow.
To change what mode to select what are of the screen to take a screenshot from change the Type drop down menu. The options in the Type menu are to take a picture of everything on all of your screens. From the Type menu select to select your last window. To choose the last area of the screen you selected select from Type menu. To change how long to delay before taking the screenshot change the Delay field. To include the mouse pointer in your screenshot check the Include mouse pointer checkbox. To not have titlebars of the window check the the No window decoration checkbox. To more precisely select which exact pixel you want to select when selecting an area of the screen check the Zoom area around mouse checkbox.
To take a screenshot where you select the screen with the mouse double click to get a where you currently have selected. To select at where there is a change in the image right click after sizing screen area to have ScreenGrab autoselect where to take the edge of the screenshot. To see how many pixels your screenshot will be when selecting a screen area it will show in the lower right hand corner of the screen.
To quit ScreenGrab press Escape or press the Rightward pointing arrow on the top right of the toolbar.
If you have the system tray enabled ScreenGrab can do many things by right clicking it. To hide ScreenGrab left click on the tray icon and select . To show ScreenGrab this way left click on the tray icon or right click the tray icon and select . To have ScreenGrab take a new screenshot from the system tray right click on the tray icon and select . To save your screenshot from the tray icon right click on it and select . To copy your screenshot to the clipboard from the systray right click on the icon and select . To open ScreenGrab preferences from the system tray right click on the system tray and select . To quit ScreenGrab from the system tray right click on the tray icon and select .
Screenshot
Version
Lubuntu ships with version 3.0.0 of ScreenGrab.
How to Launch
To launch ScreenGrab or from the command line run
screengrab
The icon for ScreenGrab looks like a teal camera shutter with a white layer on top.
Customizing
To change your settings on ScreenGrab press the gear button or press Control +P. The Main tab has settings for saving your screenshot and image quality. To change where ScreenGrab saves files by default change the Default save directory field or press Browse button to pop up a dialog to choose where to save. To change the default file name for your screenshots change the Name field. To change what format to save as by default change the Format drop down menu. To choose to copy the file name to the clipboard change the Copy file name to the clipboard when saving menu. If you are saving a JPEG image you can change the image quality with the Image quality slider.
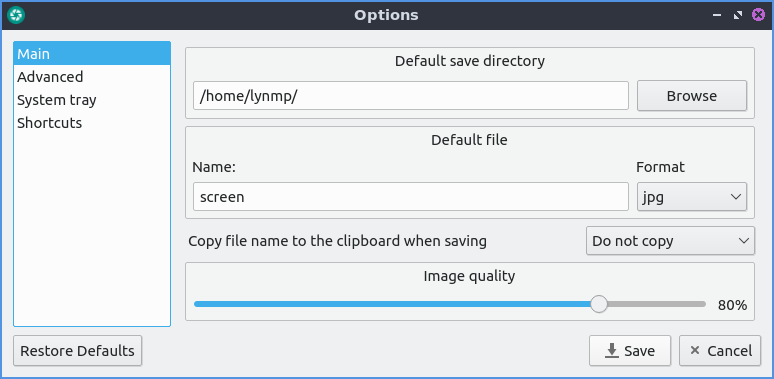
To restore your options to default press the Restore Defaults button. To cancel making changes press the Cancel button. To save your changes press the Save button.
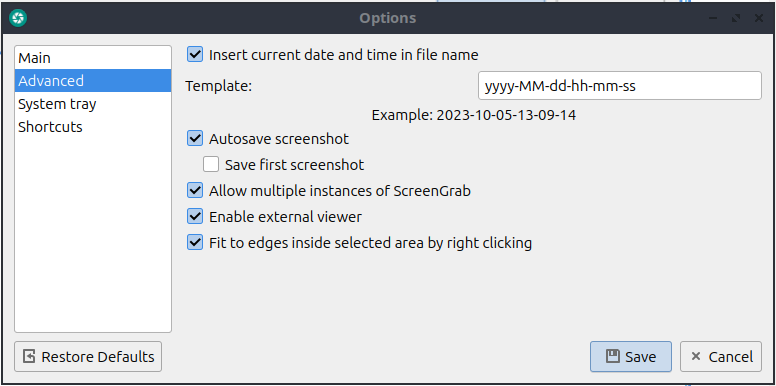
To change your settings on multiple windows and automatically saving use the Advanced tab. To automatically insert a time and date in the file name check the Insert current date and time in file name checkbox. To change how this date appears enter the date in the Template field that only shows if you insert the date and time. To automatically save each screenshot check the Autosave screenshot checkbox. To save the first screenshot check the Save first screenshot checkbox that only shows if you are autosaving screenshots. To allow more than one ScreenGrab window check the Allow multiple instances of ScreenGrab checkbox. To allow editing in a different image viewer check the Enable external viewer checkbox. To have selection autoselect an edge like of a window check the Fit to edges inside selected area by right clicking checkbox. To add a notification on saving and copying check the Notify on saving and copying checkbox. To change how long to show the notification use the Duration field.
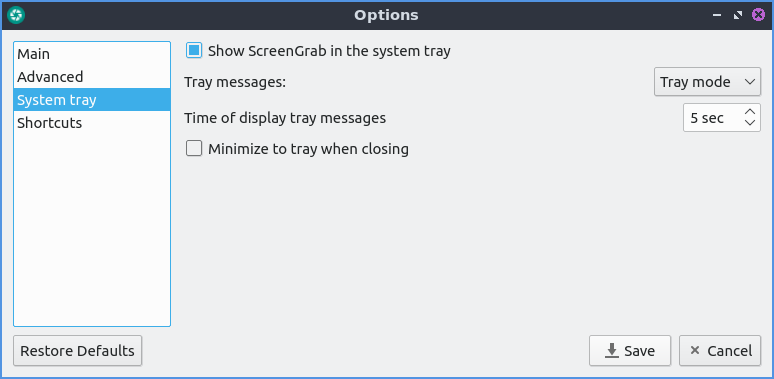
To changes with how ScreenGrab shows in the system tray use the System tray tab. To toggle showing ScreenGrab in the system tray check/uncheck the Show ScreenGrab in the system tray checkbox. To not close ScreenGrab when closing the window but keep it in the system tray check the Minimize to tray when closing checkbox.
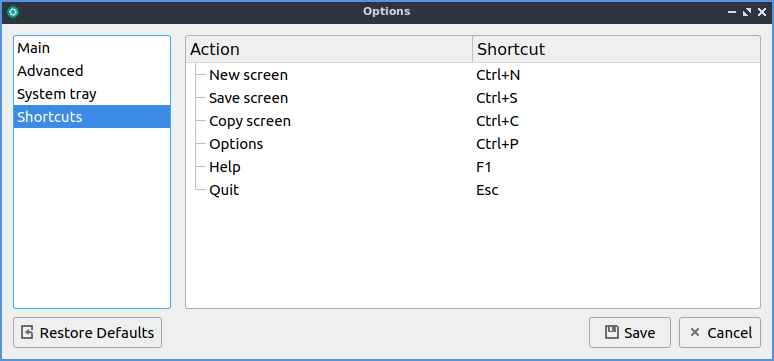
To change what your keyboard shortcuts ScreenGrab uses select the Shortcuts tab. To see what each shortcut does is on the Action column. To see what key to press get have the action happen is listed in the Shortcut column. To change a keyboard shortcut and then press the button at the bottom of Selected shortcut and press the keyboard shortcut you want to use for that shortcut.