Chapter 2.2.5 LibreOffice Writer
LibreOffice Writer is the default word processing application on Lubuntu.
- Features:
- No ribbon
- One button PDF export
- Many file formats to output
- Spellcheck
- Wordcount
Usage
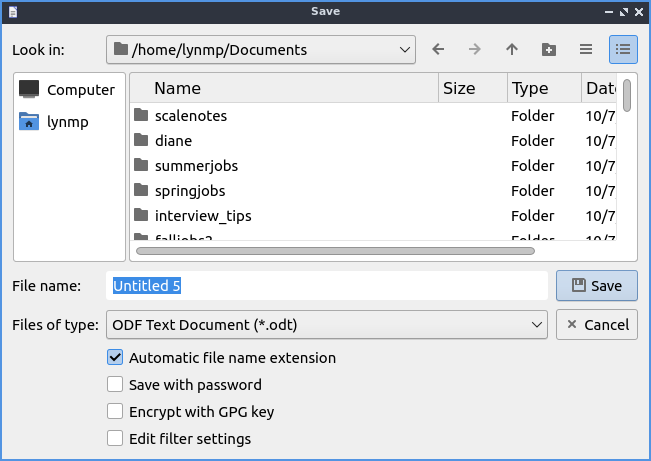
To use LibreOffice writer type what you wish to type into the main part of the window. If you wish to save your data press the icon that looks like a floppy disk or press control + s. To open a previously saved document press the button that looks like a folder or press control + o. To load or save a file from the menu to open a file or . To save your file as a new file name . To view your recent documents . To have save your file as a PDF press the button that is a sheet of paper with curved red lines on it or go and select the file type as PDF. To export as a PDF file . To export your document as ann epub . This same export menu will let you save in formats for other programs for compatibility with Microsoft word.
To change the font size there is a drop down box with a number in it you can type the font size you want in this box or select from the dropdown menu. You can change the font with the drop down box to the left of the font size which you can type and it autocompletes the fonts or select from the drop down menu. To make your text bold you can select the text with the mouse and press the button that looks like B or press control + B. To make the font italic press the button that looks like I or press control + I after selecting the text or keep typing with it to be italic. To have an underlined text select the text and press Control +U. To make strikethrough press the button that is a s with a line through it. If you want a floating window on how to style your text .
To copy text select it with the mouse or Shift + arrow key then press Control +C or . To cut text select it first and then press Control +X or . To paste text press Control +V or . To paste with no formatting press Control + Alt + Shift+ V or .
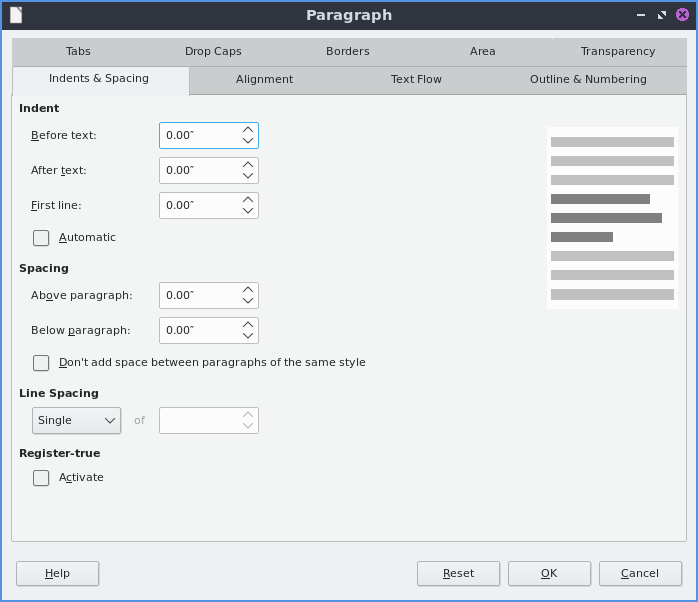
To change your spacing around your character . To manage your indentation and spacing between paragraphs and lines use the Indents & Spacing tab. The Before text field is how much indentation before each line of text. The After text is how much of an indent to put after the text. The First line field shows how you want the first line indented. To add a space above each paragraph increase the Above paragraph field. To add a space below a paragraph change the Below paragraph field. To change line spacing in this window change the Line Spacing field.
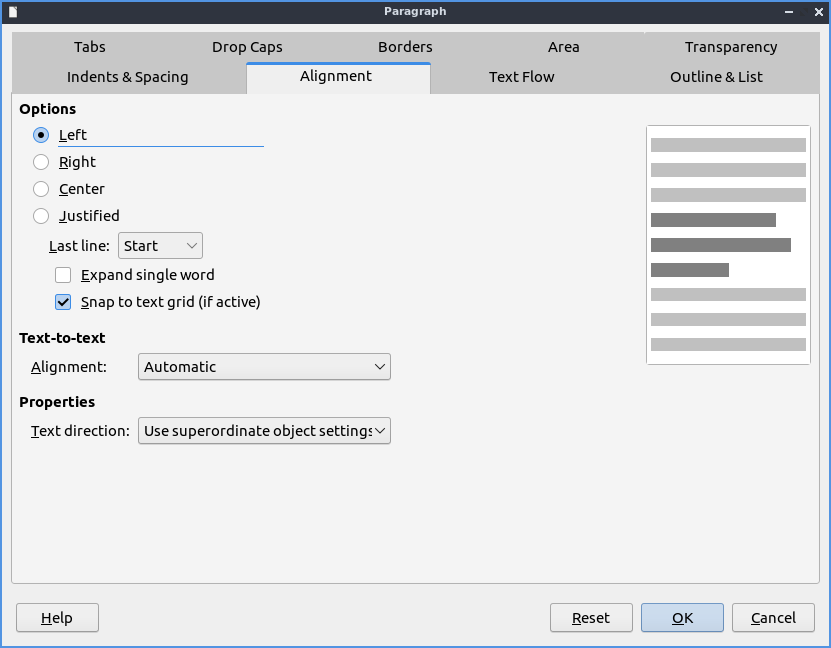
To change alignment from this window use the Alignment tab. To change the alignment choose the Left, Right, Center, or Justified radio button to align text that way. The Borders tab has settings for your border. The Style menu lets you change what kind of line is used for the border. To change the width of your border change the Width field. To choose a different presets of border type press the buttons under Presets and will be previewed in the box below. The buttons under Position change where the shadow is relative to the text. The field Distance is how far the shadow is offset from the border. To change the color of your shadow change the Color menu.
To change what how the text deals with page breaks and paragraphs use the Text Flow tab. To automatically use hyphens check the Automatically checkbox. To change how many characters to leave before the hyphen change the Characters at line end field. To change how many character after the hyphen on the next line change the Characters at line begin. To set a maximum number or hyphens change the Maximum number of consecutive hyphens field. To toggle not putting a short bit of text at the bottom of a page or column check the Orphan control checkbox. To change how many lines to not allow to be separated change the lines field to the right of Orphan control. To stop a few lines of text alone at the top check the Widow control checkbox. To change how many lines you of text to change the Lines field to the right of Widow control. If you do not want orphan or widow control check the Do not split paragraph checkbox.
To undo your changes on the paragraph window press the Reset button.
To change font color press the button that has a T with a drop on it and a red underline this will bring down several different colors you can change your text to a color you want. You can also change your font color through the window.
To make text superscript press the button with A B. To make text subscript press the button that is an A B.
If you want text in a text box that can be moved with the mouse press the button that looks like a T with a box around it or . To insert a hyperlink press Control + K or .
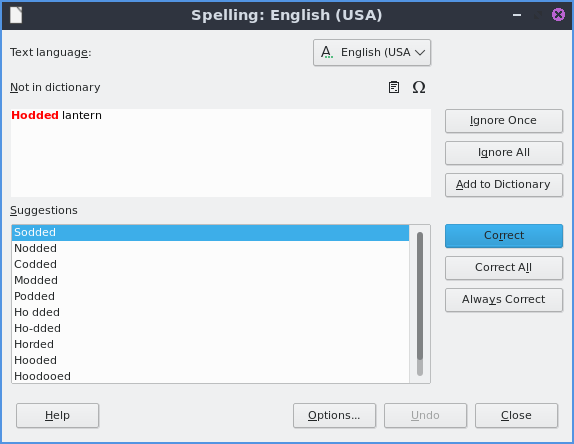
To check the spelling of your document press the ABC button with a checkmark, from the or press f7. When you have the spellcheck window open to change what language you are checking the spelling for change the Text language field. When you have what spell check thing is a typo it will be highlighted in red with context of where that appears in your document. If you think this is not an error just for this time press the Ignore Once button. To not change this at every time this occurs in the document press the Ignore All button. If what you wrote is correct and never want it marked wrong again press the Add to Dictionary button. Below what spellcheck thinks is an error will show Suggestions on what you it thinks it should correct. To select a different suggestions left click on it to select that suggestion. To replace what spellcheck thinks is an error with the suggestion press the Correct button. To replace the supposed error with the suggestion in the entire document press the Correct All button. To have this error be autocorrected press the Always Correct button.
To view how your document looks before printing it or Control +Shift +O. To get back to editing your document press the same thing again or click the close preview button. After you are done writing your document you can press the button that looks like a printer to print, press control+ p or . To toggle the preview on or off check/uncheck the Preview checkbox. To the left of the print dialog will have a preview on the left hand side. Below the preview there is a range of different pages showing which page you are previewing and how many pages the document you are printing is showing. To select which printer to use use the Printer drop down menu. To choose which pages to print there are buttons under Range and Copies heading. To change which side to print on change the Paper sides field. To change how many copies you are printing change the Number of copies field. To print in reverse order check the Print in reverse order checkbox. To change what paper size you are printing change the Paper size field. To change which direction the words are printed on the paper use the Orientation field. To change how many pages per sheet you print use the Pages per sheet field. To which order the pages are printed change the Order field. To preview which order the different pages are ordered to the right see the number of the page on the screen towards the bottom right of the print dialog. To draw a border around multiple pages check the Draw a border around each page checkbox.

To change view or change your printer settings . To view your word count of how many words are currently in the document is with nothing selected at the bottom of the LibreOffice writer window. If you select text with the mouse you can also see the word count of selection from the same spot. The word count is also shown on the very bottom of the window.
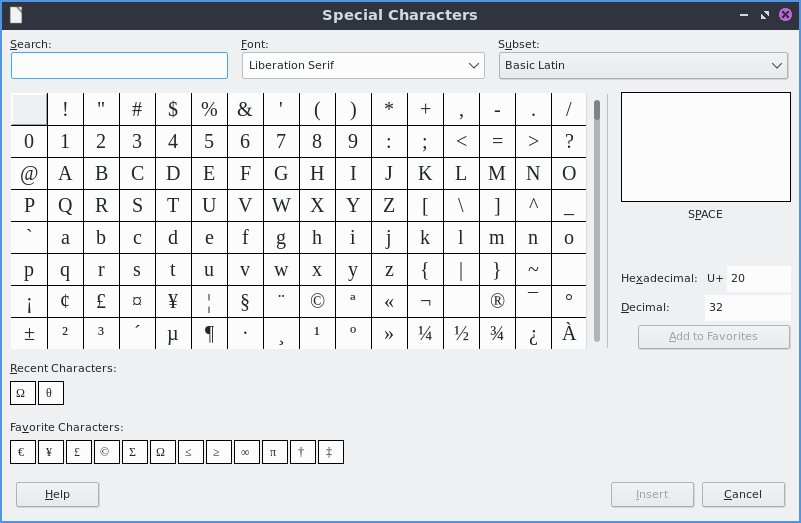
To insert special symbols or characters press the button with the Ω symbol or from the menu . To insert a page break press control + enter or from the menu .
To undo a mistake you make press control + z or press the yellow arrow pointing to the left. If you accidentally undid code redo or press the green arrow pointing to the right or press control + y. Under the arrow buttons there is a drop down button that brings up a menu for which steps to undo and redo.
To center your text is press the button with the horizontal lines centered or . To have your text justified to the right press the button with the lines on the right or . To have your text aligned to left press the lines on the left with or . To center justify your text which will add spaces in between words to make it appears at both orders press the button that has solid horizontal lines all of equal length to center justify the text or .
If you want to change your line spacing of your document for double spacing or for one and a half line spacing. To change back to single line spacing of your document .
To Insert a page number . To insert the current time into the document . To insert the current date into the document . To insert the number of pages in the document .
To have a header shown at the top of each page . To have a footer at the bottom of each page . To get back to writing the main part of the document left click on the body of the document.
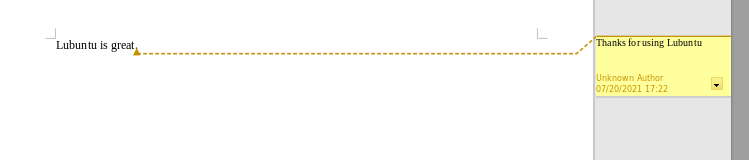
To add a comment inline into the document press Control+Alt+C or right click and select . Type your comment in the yellow box to the right to leave a note on that comment. To leave a reply to this comment press the downward pointing arrow .
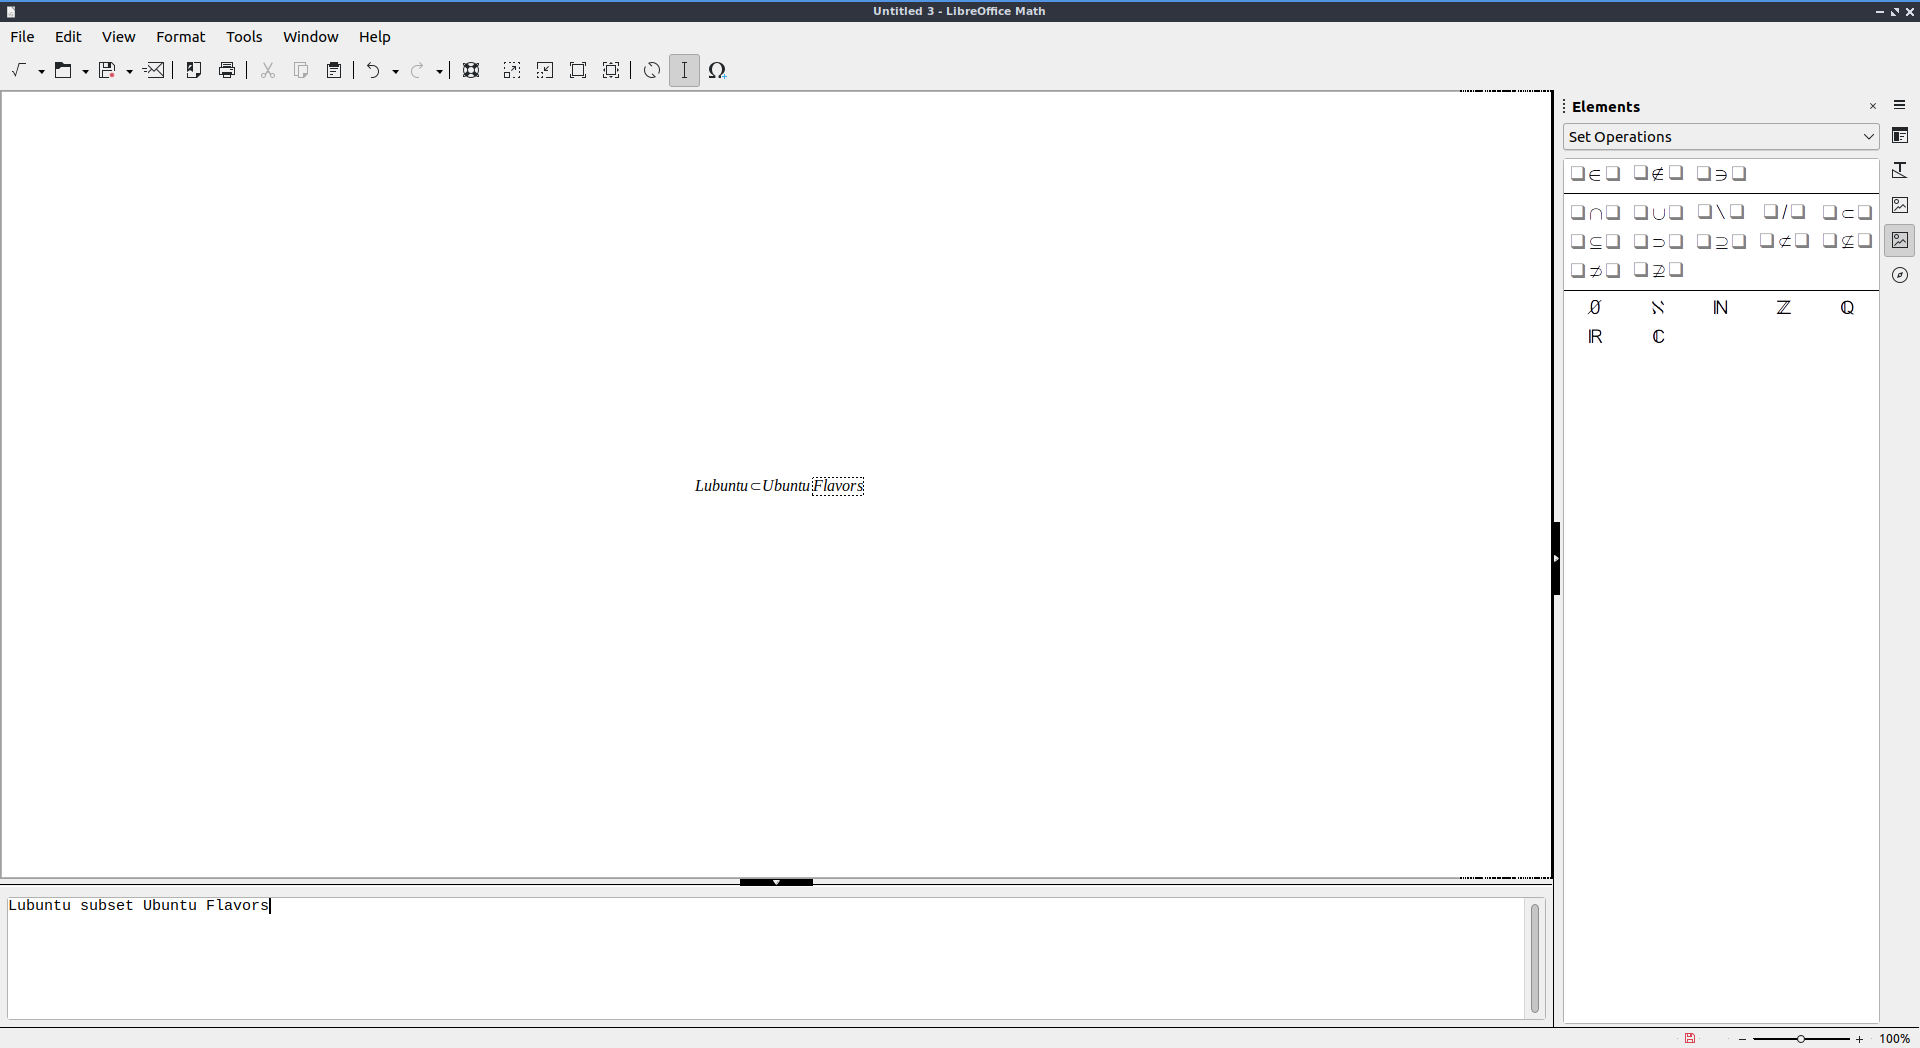
To insert a mathematical formula into your document you are process and a user interface similar to LibreOffice math will appear allowing you to insert the formula.
To select all text in the document press control + A or . If you want to select text with a rectangle with how you draw the mouse press Alt + Shift +F8 or . To switch back to normal selection . To jump to a specific page press Control + G or and a dialog will pop up. To enter a page number in the Page field and click OK to go to that page.
To have a view of the document with no margins shown like on a webpage or To get back to the original view . To toggle a vertical scrollbar . To have a horizontal scrollbar .
To toggle your view of rulers press Control + Shift +R or . To only toggle showing a vertical ruler . To toggle seeing formatting marks press Control + F10 or :menuselection:` View –> Formatting Marks`. To toggle making LibreOffice Writer press Control + Shift + J or .
To zoom for the entire page to be visible . To zoom so you can see the width of the page and everything is bigger . To zoom in a bit more and not see the margins on the page . To zoom to 100 percent zoom . Another way to change zoom is there is a zoom slider in the bottom right hand corner to increase zoom in move the slider to the right and to zoom out move the slider to the left.
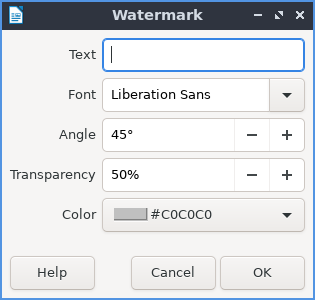
To insert a watermark on the background of the page . To change what the watermark says input that into the Text field. To change the font of the watermark change the Font field. To change the angle from horizontal text use the Angle field in degrees. To change your how transparent the water mark is change the Transparency has 100 as entirely clear and 0 as entirely opaque. To change the color of the watermark use the Color drop down pop up menu.
To leave LibreOffice Writer press Control+Q.
Columns
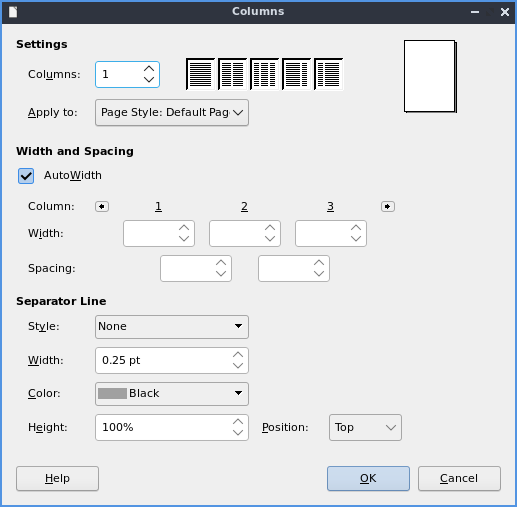
To add multiple columns to your document . To have multiple columns in the field that says Columns and set to the number of columns you want. To change the spacing between the two columns change the Spacing field. To have a line to separate your columns use the Style drop down menu to select the lines. To change the color of your lines change the Color drop down menu. When you are done with your settings press the OK button or if you decide you do not want to make changes to columns press the Cancel button.
To add a column break to the next column press Control+Shift+Enter or .
Comments
To add a comment to a file with LibreOffice Writer press Control +Alt +C, right click , or . To add text on the comment click in the yellow area and type in your comment. To delete a comment press the downward pointed arrow in the yellow comment and select . To get back in the body of the document click in the white part towards the left of the document. To read when a comment was made look at the bottom of the comment in yellow.
Lists
To add a list of bullet points press Shift +F12 or . To start a numbered lists press F12 or . To move an item up in your list . To move an item down in your list . To demote a point to a subpoint . To promote this point back up to its previous level .
Find And Replace
To search for text in your document press Control +F, , or which pops up a toolbar on the bottom. To enter the text to search enter into the searchbar on the bottom. To go to the next result press the downward pointed arrow button. To go to the previous result press the upward pointing arrow button. To close out of finding text click the red circle x button. To not match case uncheck the Match Case checkbox.

To find and replace text press Control+ H or . To have what text you want to be find in the document to be replaced in the Find field. To have the end result of what you after replacing in the Replace field. To find and select all occurrences of the string in the Find field click the Find All button. To replace every occurrence of the word of find press the Replace All button to change everything.
Styles
To quickly set a title for your your document . To choose a quick subtitle for your document . To choose to style something as a heading press Control+1 or . To choose a style of a subheading press Control+2 or . To choose an even lower level heading press Control+F3 or . To quickly switch to a bulleted list . To switch to a numbered list . To have a list styled with uppercase letters . To switch to a list with lowercase letters choose . To get a list with uppercase roman numerals select . To make a list with lowercase roman numerals select . To get back to your original normal style press Control+0 or .
Images
To insert an image into your go to to insert an image directly to your word processing document. To move your image around left click on it and drag the image around. To resize the image while keeping the same aspect ratio click on one of the blue boxes around the corner to resize the image. To remove an image you decide you do not want in your document press the Delete key. To rotate an image to the right left click on it to select it and right click on the image . To rotate an image to the left right click on the image . To rotate an image to fix it appearing upside-down left click the image and right click . To get an image back to its original position . To rotate an image freely by the mouse and drag with the mouse to where you want the image rotated. To flip your image vertically right click on the image . To flip your picture horizontally .
Tables
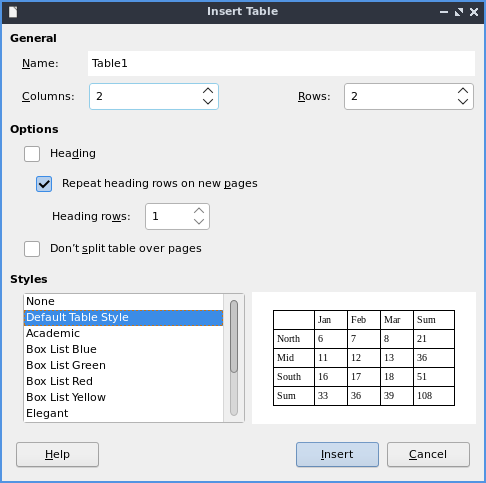
To insert a table and a table dialog window will popup. To change the number of columns change the Columns field. To change the number of rows change the Rows field. To view a different styles for your table are under the Style menu and you can see a preview to the right of the menu. To input text into a part of the table simply left click over that part of the table. To move to another part of the table with the arrow key with the direction you want to go.
To add a row above your current row . To add a row below the current row . To add a column before the current one . To add a column after the current one . To add multiple rows or columns or . To switch how many of multiple rows or columns change the Number field. To switch to adding rows or columns above or below press the Below Selection button. To actually add the rows or columns press the OK button. To delete a row . To delete a column . To delete the whole table .
Document Properties
To bring up a window with properties of your document . The General tab shows metadata about the file including creation or modification time.

The Description tab has fields to input title subject and keywords and lets you also put in comments. The Title is where you can optionally put the title on. The Subject is a field to input the subject of the document. The Keywords is to input keywords on the document. The Comments is where you can have comments about the document.
The Font tab has settings for embedded fonts to make sure they always display properly. To embed any fonts you check the Embed fonts in the document checkbox. To only embed the fonts needed to see the document check the Only embed fonts that are used in documents checkbox. To chose to embed fonts with a Latin script check the Latin fonts checkbox. To embed Asian fonts check the Asian fonts checkbox. To embed complex fonts check the Complex fonts checkbox.
To see statistics on your document use the Statistics tab. To see how many pages are in your document look at the Pages row. To see how many tables are in a document see the Tables row. To see how many images are in your document read the Images row.
Version
Lubuntu ships with LibreOffice Writer version 7.3.2
How to Launch
To launch go to menu or run
lowriter
from the command line. The icon for LibreOffice Writer looks like a piece of paper with several lines of writing.