Chapter 2.2.2 LibreOffice Calc
LibreOffice Calc is the default spreadsheet program for Lubuntu.
Usage
To move between cells press the arrow keys in the direction you want to move. To enter data into cells type in the keyboard. To select cells left click and drag to select the cells you want. To sum data from cells in the cell where you want the sum is to press the button that looks like Σ character and then drag the mouse over the cells you want to add. To sort your cells in descending order press the button with bullet points and an arrow going down. To sort in ascending order press the button with bullet points and an arrow pointing upwards.
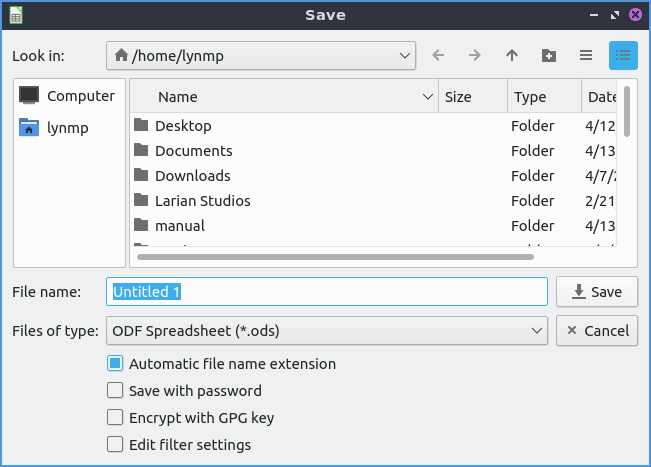
To save your spreadsheet you need to press the button that looks like a floppy disk, press the keyboard shortcut or go to . To save with a different file name . To open a file press the button that looks like a brown folder and add select the file you want from the dialog or . To open a recent document .
To copy data you can right click , press the button with two pieces of paper or press control + c. To paste data press control control +v, , right click , or press the button that is a clipboard with a piece of paper on it. To cut text press control+x, right click , or press the scissors button to cut text. If you want to paste your text unformatted press Control+Shift + Alt+V or .
To change to showing currency for the number press Control+Shift+4 or . To change to percentage press Control+Shift+5 or . To switch back to a normal number press Control+Shift+1 or .
To view values highlighted in another color to see them easier press Control+F8 or .
To view a long list of functions to use . To select different functions left click on the function name in the column. To insert a function press the fx button. To sort by different categories of functions use the drop down menu to the right of the fx button. To close this function sidebar press the x button.
To see a gallery of stock images for your spreadsheet . To get a list of different categories of images beneath Galleries and left click to select your image. To move an image in from the gallery to your spreadsheet left click on the image and drag the image to where you want.
To style part of your spreadsheet to bring lots of attention to a cell . To bring slightly less attention to a cell . To bring even less attention to a cell . To style a cell like a heading . To have a slightly smaller heading . To switch back to your original style .
To insert an image press . To select an image to change how it appears in your spreadsheet left click on it. To resizing your image while keeping the same aspect ratio click on the box on a corner of your image. To stretch or shrink an image horizontally left click on the boxes on the left or right hand side and then release when in the giant position. To stretch on shrink your image vertically click on the box on the top or bottom and drag to your desired position. To change what image shows on the spreadsheet right click on the image and select . To save an image in a spreadsheet right click on the image and select . To remove an image from your spreadsheet press the Delete key.
If you want to insert a new column to the left of a column right click on the letter for the column . If you want the new column to the right is right click on the letter and . To insert a row above the current row right click on the number and . To insert a row below the current row right click on the number and . To delete a row or column right click the number and select or .
To change the size of a row or column of cells click in between the border of that particular row or column and drag with the mouse to give yourself room.
To sort your data like a bunch of names first select all the cells with the mouse . If you want the reverse order to this you can have .
To undo a selection press control +z or press the button with the arrow looping around and pointing to the left. To redo an operation press Control +y or the number looping to the right and exiting to the left.
To zoom to view a full page on your spreadsheet in the menu . To view the whole width of your page on the menu . To zoom to a particular percentage and select the percentage you want. Another way to change your zoom is the slider in the bottom right hand corner. To zoom in move the slider to the right and to zoom out move the slider to the left. To see your current zoom is in the bottom right hand corner. To bring up a more zoom options right click and select which zoom you want.
To select all cells in your spreadsheet press Control+A. To select an entire column press Control+Space or . To select an entire row press Shift +Space or .
To create a new spreadsheet in the same file press the button on the bottom that looks like a + or . To switch between each sheet press the button on each sheet at the bottom near the button to add a new sheet.
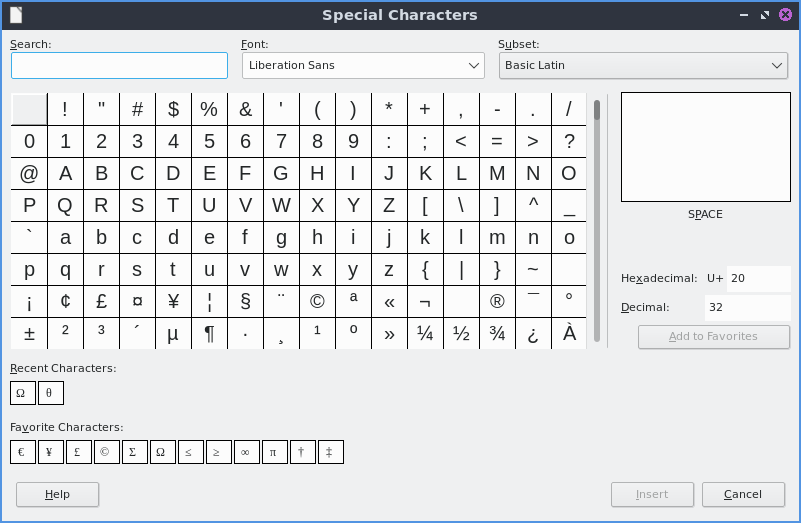
To insert a special character not on your keyboard . To select what character to insert left click in the center of the inserting character window. To search for a symbol type your search term into the Search field. To chose which group of symbols to choose from use the Subset drop down menu. To actually insert the symbol press the Insert button.
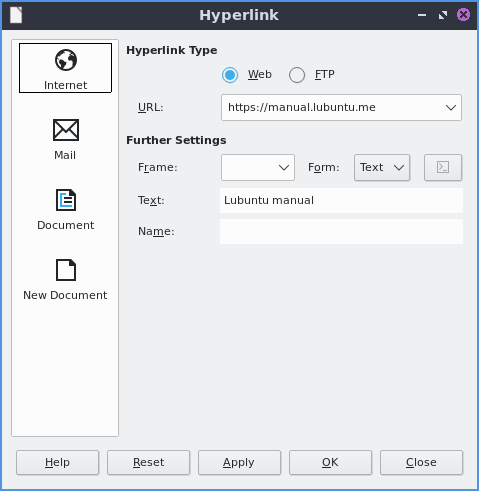
To insert a hyperlink in LibreOffice Calc or press Control+K. To actually type the address in the URL field. To switch to a button for the hyperlink use the Form button. To switch back to text use the Form drop down and select Text.
To make text bold in LibreOffice Calc press Control + B or . To make text italic press Control + I or . To have your text have a single underline .
To align text in the center of the cells press Control +E or . To align text in the cells to the right of the cell press Control +R or . To switch the text back to being on the left press Control +L or . To align text so that the edges of each cell all line up with being stretched in the center press Control + J or . To align text to the top of the cell . To center thee text vertically in the cell . To align text to the bottom of a cell .
To format your cells for a number with two decimal places press Control+Shift+1 or . To format a number as a percent press Control+ Shift+ 5 or . To format a cell as currency press Control + Shift + 4 or . To format a cell as a date press Control+ Shift+ 3 or . To format a cell as time . To format the cell in scientific notation press Control + Shift + 2 or . To switch your formatting back to the general default press Control+ Shift +6 or . To add a thousands separator to your number .
To toggle hiding the formula bar . To toggle viewing the status bar at the bottom . To toggle showing the headers that show what each cell is like a4 . To toggle viewing gridlines .
To add a new spreadsheet quickly at the end press the + button at the bottom. To switch between different sheets left click on the sheet name at the bottom bar. To delete a sheet you added right click on it :menuselection:` Delete Sheet` and then confirm you are deleting that sheet. To rename a sheet right click on the sheets name and . To see which sheet you are on it will be underlinded at the bottom bar and also say how many sheets along the bottom bar.
To insert a comment press Control + Alt +C or . To then type the comment in the yellow popup. To toggle viewing your comments .
To quit LibreOffice Calc press Control+Q.
Charts
To get to the dialog of how to insert a chart . The first selection is to choose a Column, Bar, Pie, Area, Line, XY(Scatter), Bubble, Net, Stock, or Column and Line chart. To change the subtype of graph click the picture of a chart that looks like the type you want. To switch to the next step of making a graph press the Next button.

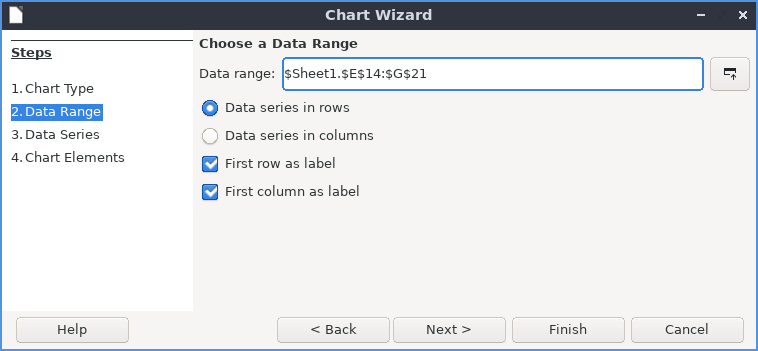
The Data Range tab controls what data will be in the chart and how present it. To switch to basing the bottom axis of your chart on rows of data press the Data series in rows button. To choose to switch your bottom axis of your chart on columns press the Data series in columns button. To use the first row as a label on each item on the chart check the First row as label checkbox. To input a custom title on the first column of your chart check the First column as Label checkbox.
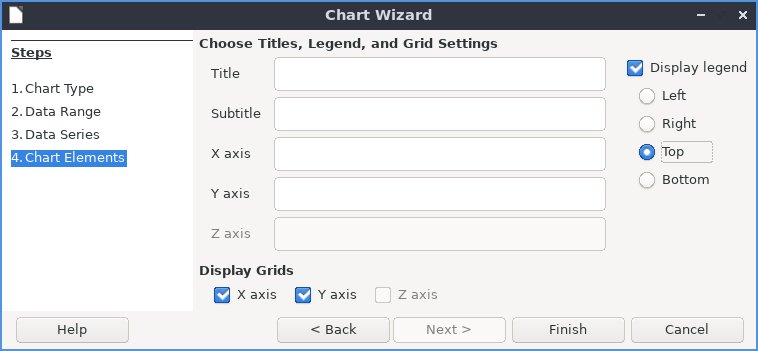
The Chart Elements tab controls labels and displaying legends on your chart. To add a title to your chart type your title in the Title field. To add a subtitle to your chart type it in the Subtitle field. To add a label to your horizontal axis type your label in the X axis field. To label your vertical axis type your label in the Y axis field. To have a vertical grid lines on your chart check the X axis checkbox. To have horizontal lines on your grid check the Y axis checkbox. To toggle displaying a legend on your graph check the Display legend checkbox. To move the legend to the left hand side press the Left button. To move the legend to the right hand side press the Right button. To move the legend to the top of the chart press the Top button. To move the legend to the bottom of the chart press the Bottom button.
Version
Lubuntu ships with version 25.2.2 of LibreOffice Calc.
How to Launch
To launch LibreOffice Calc from the menu go to or run
localc
from the command line. The icon for LibreOffice Calc is a piece of paper with a green icon with a spreadsheet on it.